


-
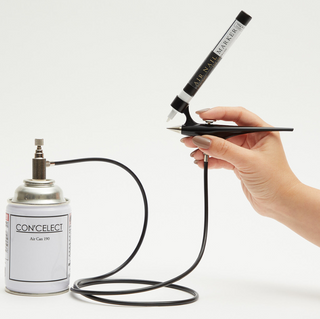
Make.N Creamy Pod Set
This set includes a syringe without a needle and a cream applicator cap.
(Please note: If you store the gel inside, it may cure, so be sure to clean the items thoroughly before storing them!)


<How to Use>
1. Gently pull the syringe upwards to fill it with gel.
(Make sure to use a gel with some texture! If the gel is too runny, it won’t hold its shape well.)2. Clean the syringe tip thoroughly and attach the applicator cap.
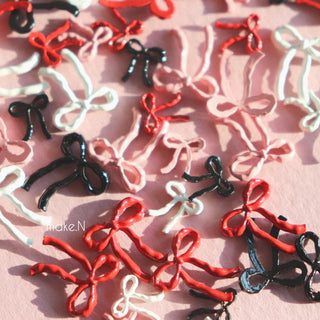
3. Create your desired nail art in various shapes.

< How to Clean>
1. With the applicator cap attached, place the syringe in a dish filled with ethanol.
Move the plunger up and down several times to rinse thoroughly.2. Remove the applicator cap and pump the syringe several times. (The more times you pump, the cleaner it will get.)
3. Rinse the applicator cap separately. (Finish by using a cotton swab to wipe off any remaining residue.)
Make.N Creamy Pod Set
This set includes a syringe without a needle and a cream applicator cap.
(Please note: If you store the gel inside, it may cure, so be sure to clean the items thoroughly before storing them!)
<How to Use>
1. Gently pull the syringe upwards to fill it with gel.
(Make sure to use a gel with some texture! If the gel is too runny, it won’t hold its shape well.)
2. Clean the syringe tip thoroughly and attach the applicator cap.
3. Create your desired nail art in various shapes.
< How to Clean>
1. With the applicator cap attached, place the syringe in a dish filled with ethanol.
Move the plunger up and down several times to rinse thoroughly.
2. Remove the applicator cap and pump the syringe several times. (The more times you pump, the cleaner it will get.)
3. Rinse the applicator cap separately. (Finish by using a cotton swab to wipe off any remaining residue.)
